

How To Make Waves On A Cake
Fondant bounding main waves on cakes are a nifty decorating idea for embankment themed cakes. Here is one such idea I used for a embankment altogether cake I designed for an xviii-year-onetime girl recently.

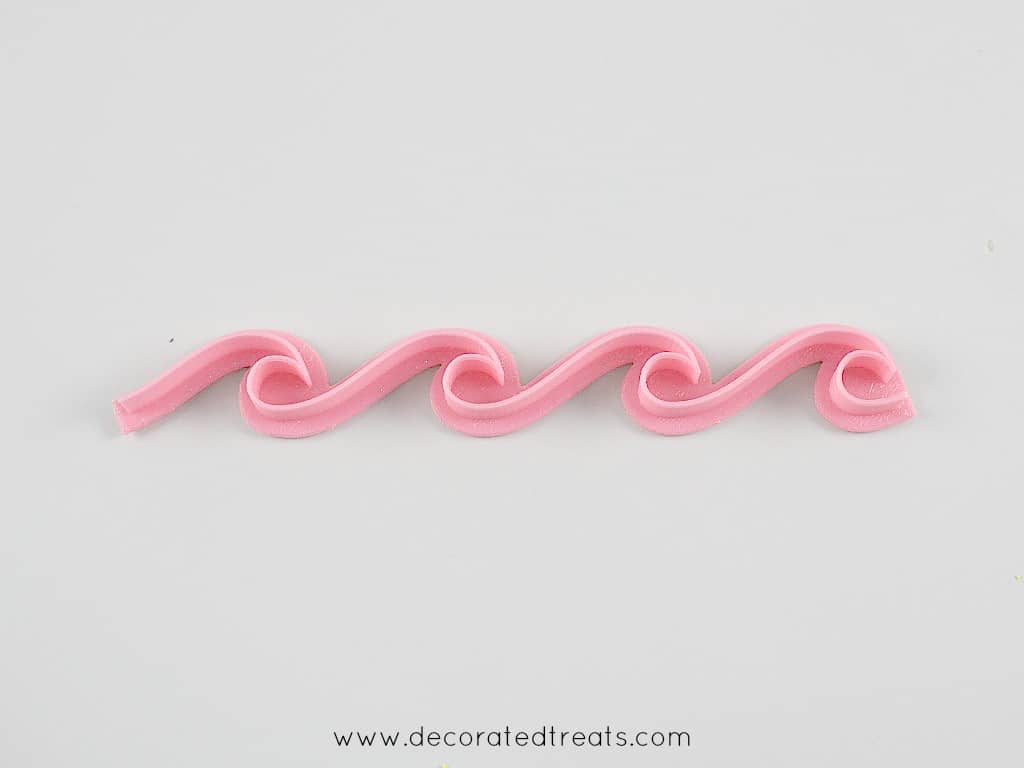
In fact, I used 2 different types of fondant ocean waves effect on the cake, ane which is 2D (every bit can be seen in the image above and is also what this tutorial covers) and the other is a 3D consequence (the swirls of fondant on both tiers) which is covered in a separate tutorial hither.
I have likewise put together a full tutorial on how to assemble the embankment birthday cake and you lot can encounter it hither.
Now dorsum to the 2d fondant ocean waves tutorial I am going to cover on this page. Meet beneath for the master supplies needed and how I put the waves up on the cake.
How to Create Ocean Waves on Cakes with Fondant:
These are the supplies needed :
- Ocean Waves Cutter - I bought this cutter from an online shop. This is just one cutter and I used it to create 2 different types of ocean waves on my cake.
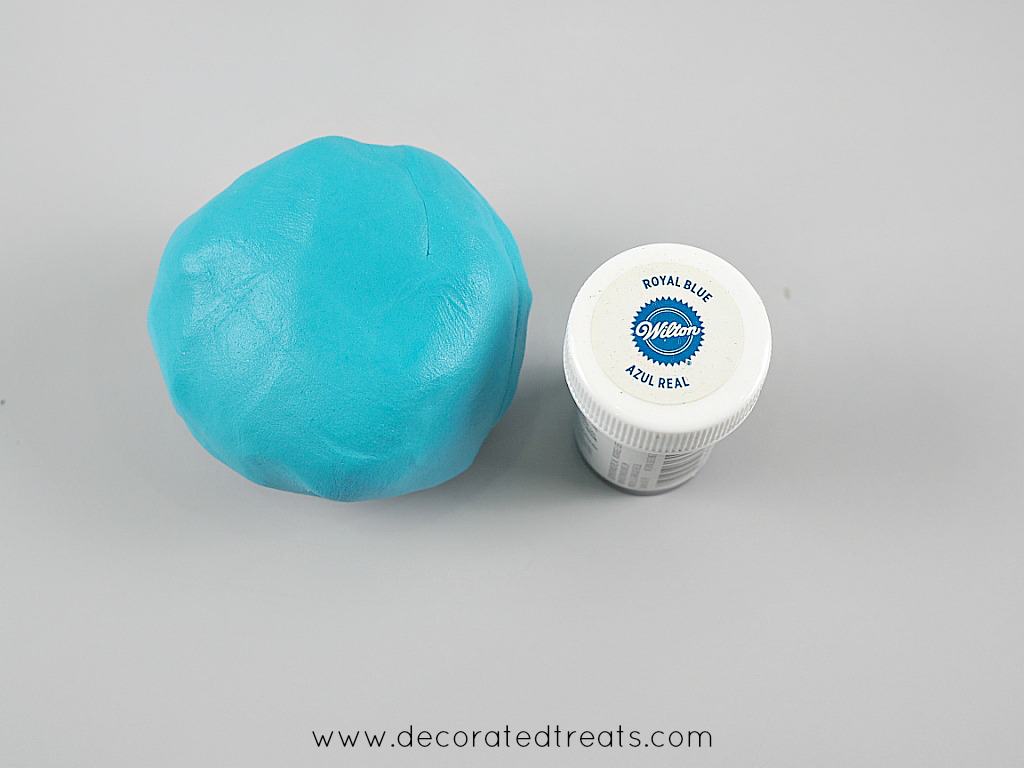
- Fondant - I used Satin Ice fondant in white and colored it blue with Wilton Regal Blue food color.
- Wilton Royal Bluish nutrient color - I used this to tint my white fondant to make the ocean waves.
- Sugarcraft knife - This is one of my favorite block decorating tools. I used this handy tool for cutting off excess fondant ocean waves from my cake.
- Shortening - I used shortening as the glue to put the waves upwardly on the cake.
- Ruler - this is to help guide me when trimming my fondant waves.
How to get together the fondant waves:
- The outset task was to tint my fondant. I tinted it very lightly. For this purpose, I dipped a toothpick into the nutrient colour bottle and used only that to color my fondant.
Waves for the superlative tier
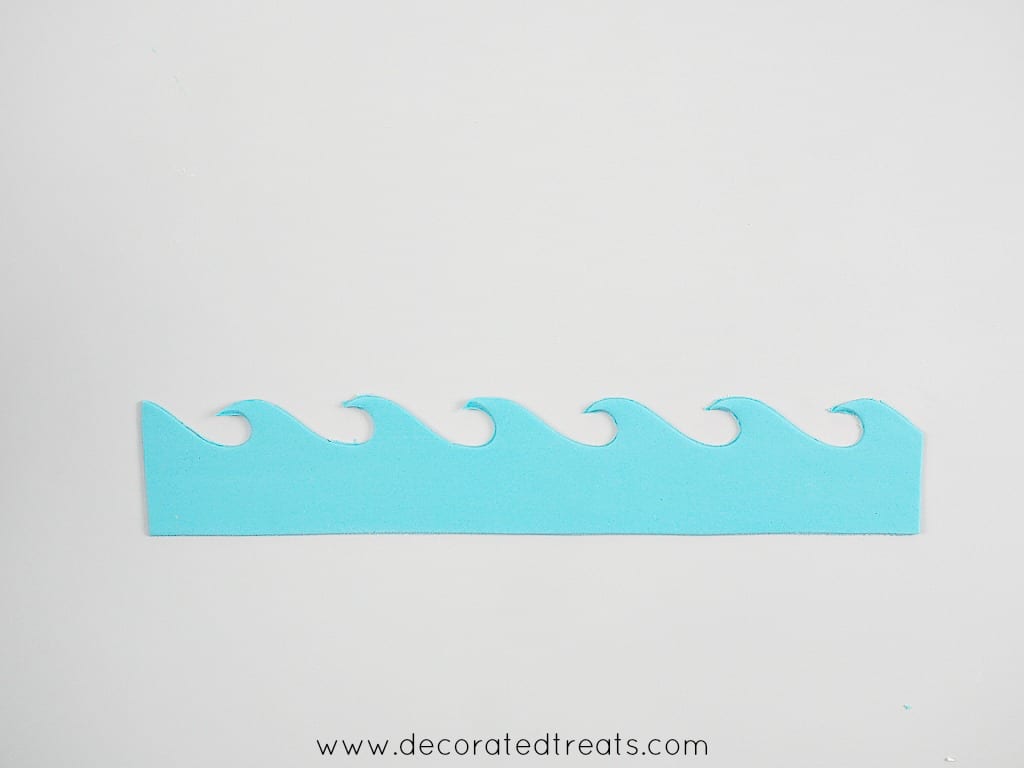
- Next was cutting out the waves. By positioning the cutter in different positions when I cutting the fondant, I was able to brand 2 different types of fondant bounding main waves for my block.
- The first blazon I made was the rounded fondant waves. I used these for the commencement tier of the cake. To make these waves, I rolled a long thin piece of fondant and placed the cutter with its bottom side upwards. I made sure the width is as what I wanted it to exist and the length was enough to cover the sides of the cake.
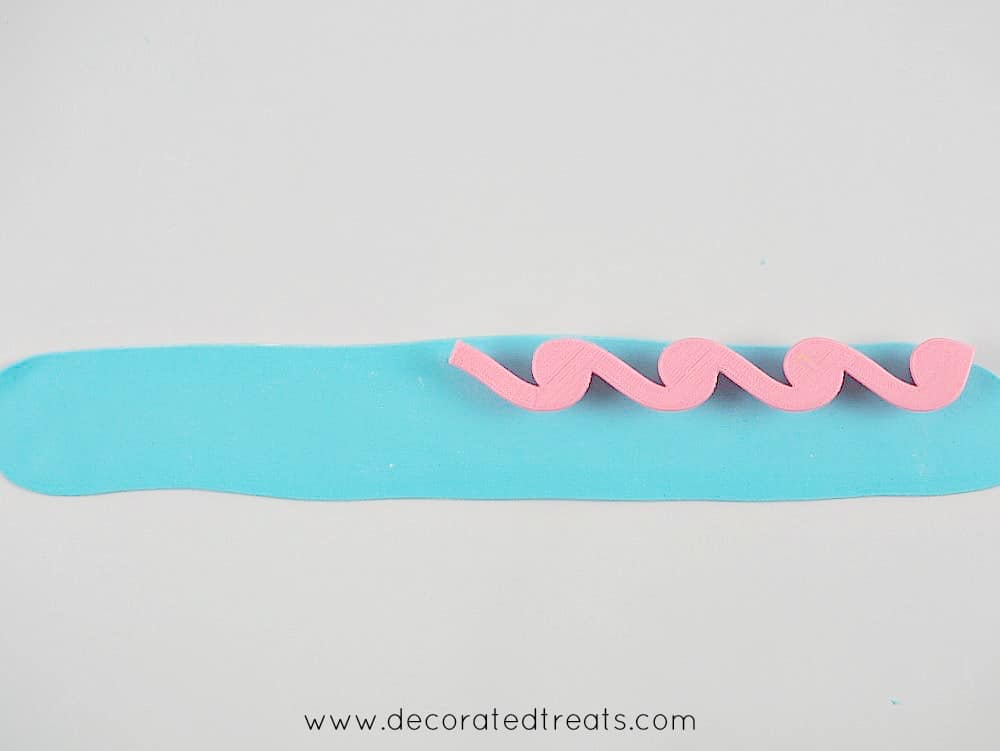
- And then I pressed it into my fondant strip. Since the cutter in open-concluded and I wanted my sea waves to be seamless, I but lifted the cutter and placed it side by side to the cut pattern so that the waves are cut seamlessly.
- And then, using my ruler, I trimmed the bottom to get in even.

- To adhere the fondant ocean waves on the block, I brushed the cake with some shortening and then carefully rolled the body of water waves loosely and unrolled information technology as I attach information technology to the sides of my cake. To make sure the pattern appears even all around the cake, when unrolling the fondant waves towards the starting line, I accommodate it so that the design overlaps consistently.

- And and so I used my sugar arts and crafts knife and cutting the excess fondant waves off.

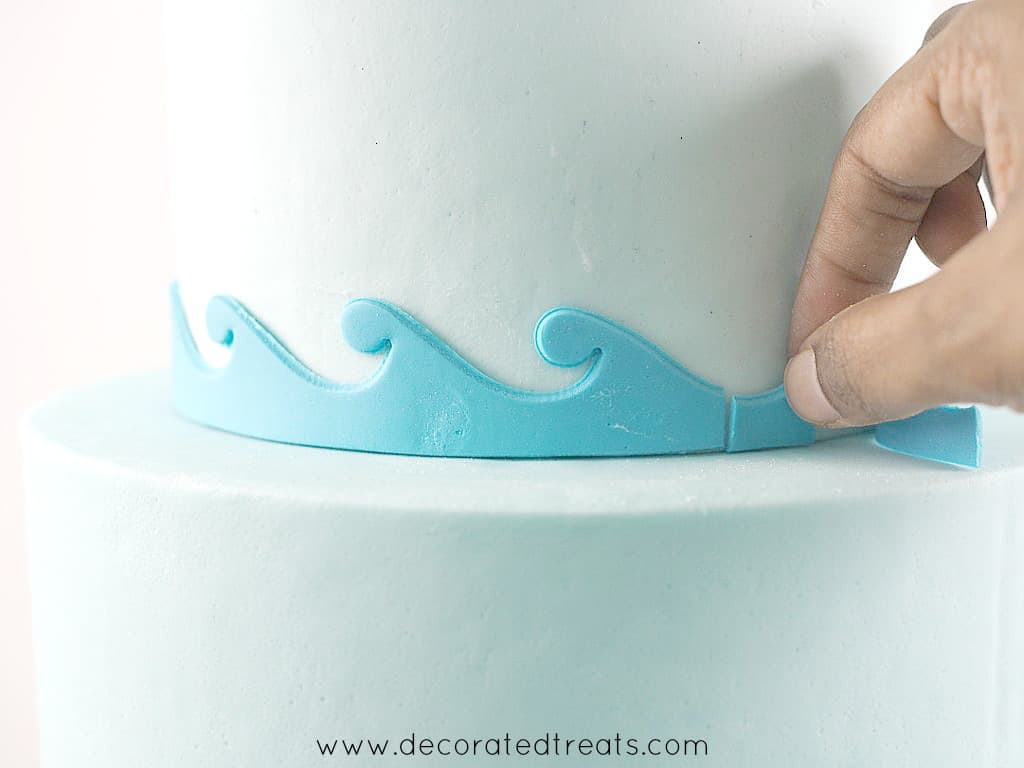
- Run into how the pattern appears continuous after joining:

Waves for the bottom tier
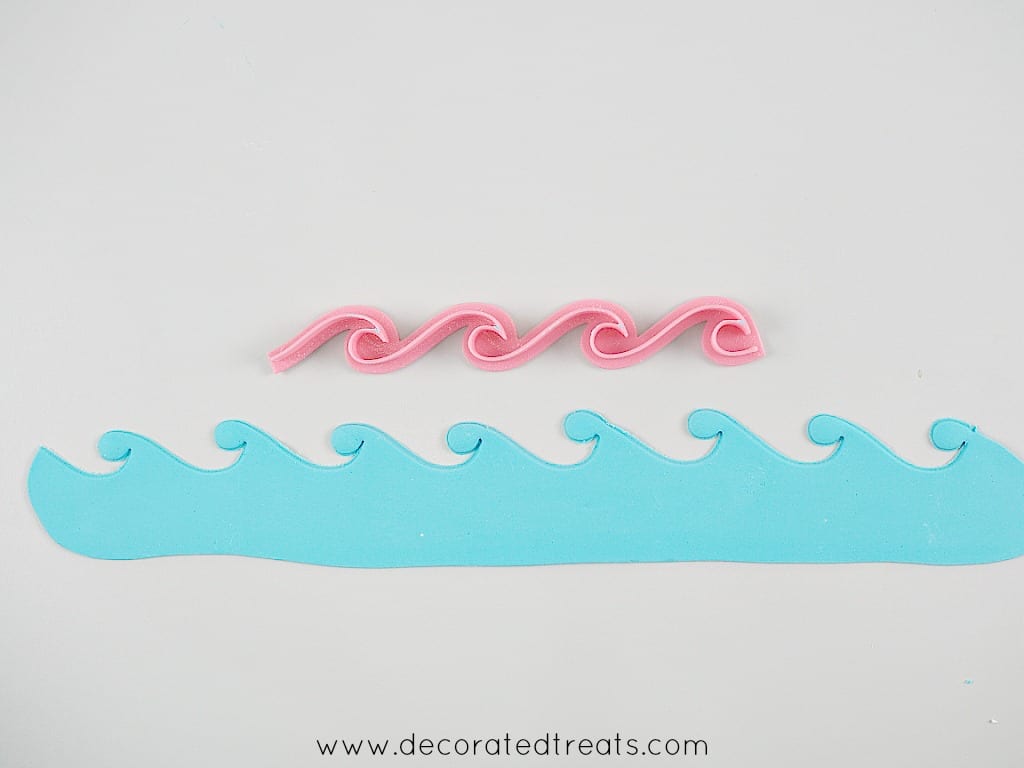
- Next were the fondant sea waves for the lesser tier. Again, I used the same cutter, only this time, with the pointed waves up and the rounded waves at the lesser (this essentially means placing the cutting in the contrary direction every bit compared to the earlier placement). And I used my ruler to guide the cutter and so that I get the waves in a straight line and the width is consequent.

- This was how the fondant body of water waves turned out:
- I attached it to the cake the same way as I did for the before waves pattern.

- The completed waves on both my block tiers looked like this:
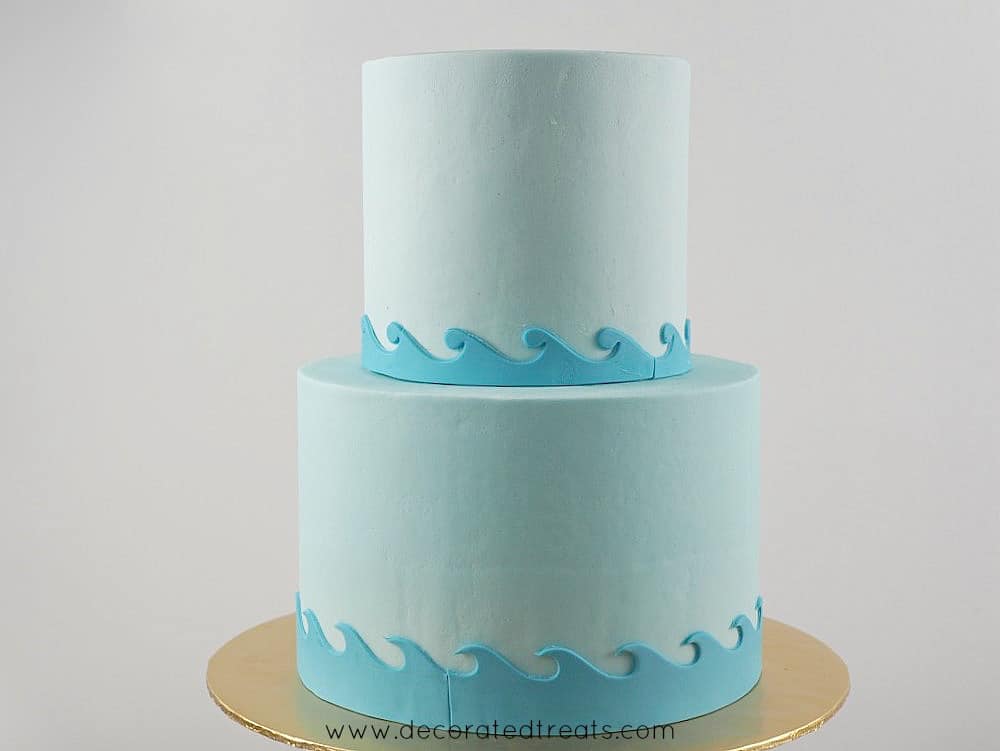
- These waves were the base decoration on my beach birthday cake. This was how the cake looked like upon completion:

Hope you enjoyed this ocean waves on cakes tutorial.
Happy Decorating 🙂
Reader Interactions

How To Make Waves On A Cake,
Source: https://decoratedtreats.com/ocean-waves-on-cakes.html
Posted by: campbelltrailtoo.blogspot.com
0 Response to "How To Make Waves On A Cake"
Post a Comment